Five-minute tour
This tour walks the entire clinical data lifecycle on the seeded demo study, from data entry with edit checks through query resolution, source data verification, Part 11 signature, snapshot publication, and self-service analytics, switching between the clinical roles that would perform each step in a real study.
Prerequisite: a running stack with the demo study seeded
(Installation). The demo users are demo-admin,
demo-dm (data manager), demo-inv (investigator), demo-coord (site
coordinator), and demo-cra (monitor); they share the password printed by
db:seed-demo.
1. See the study as a coordinator
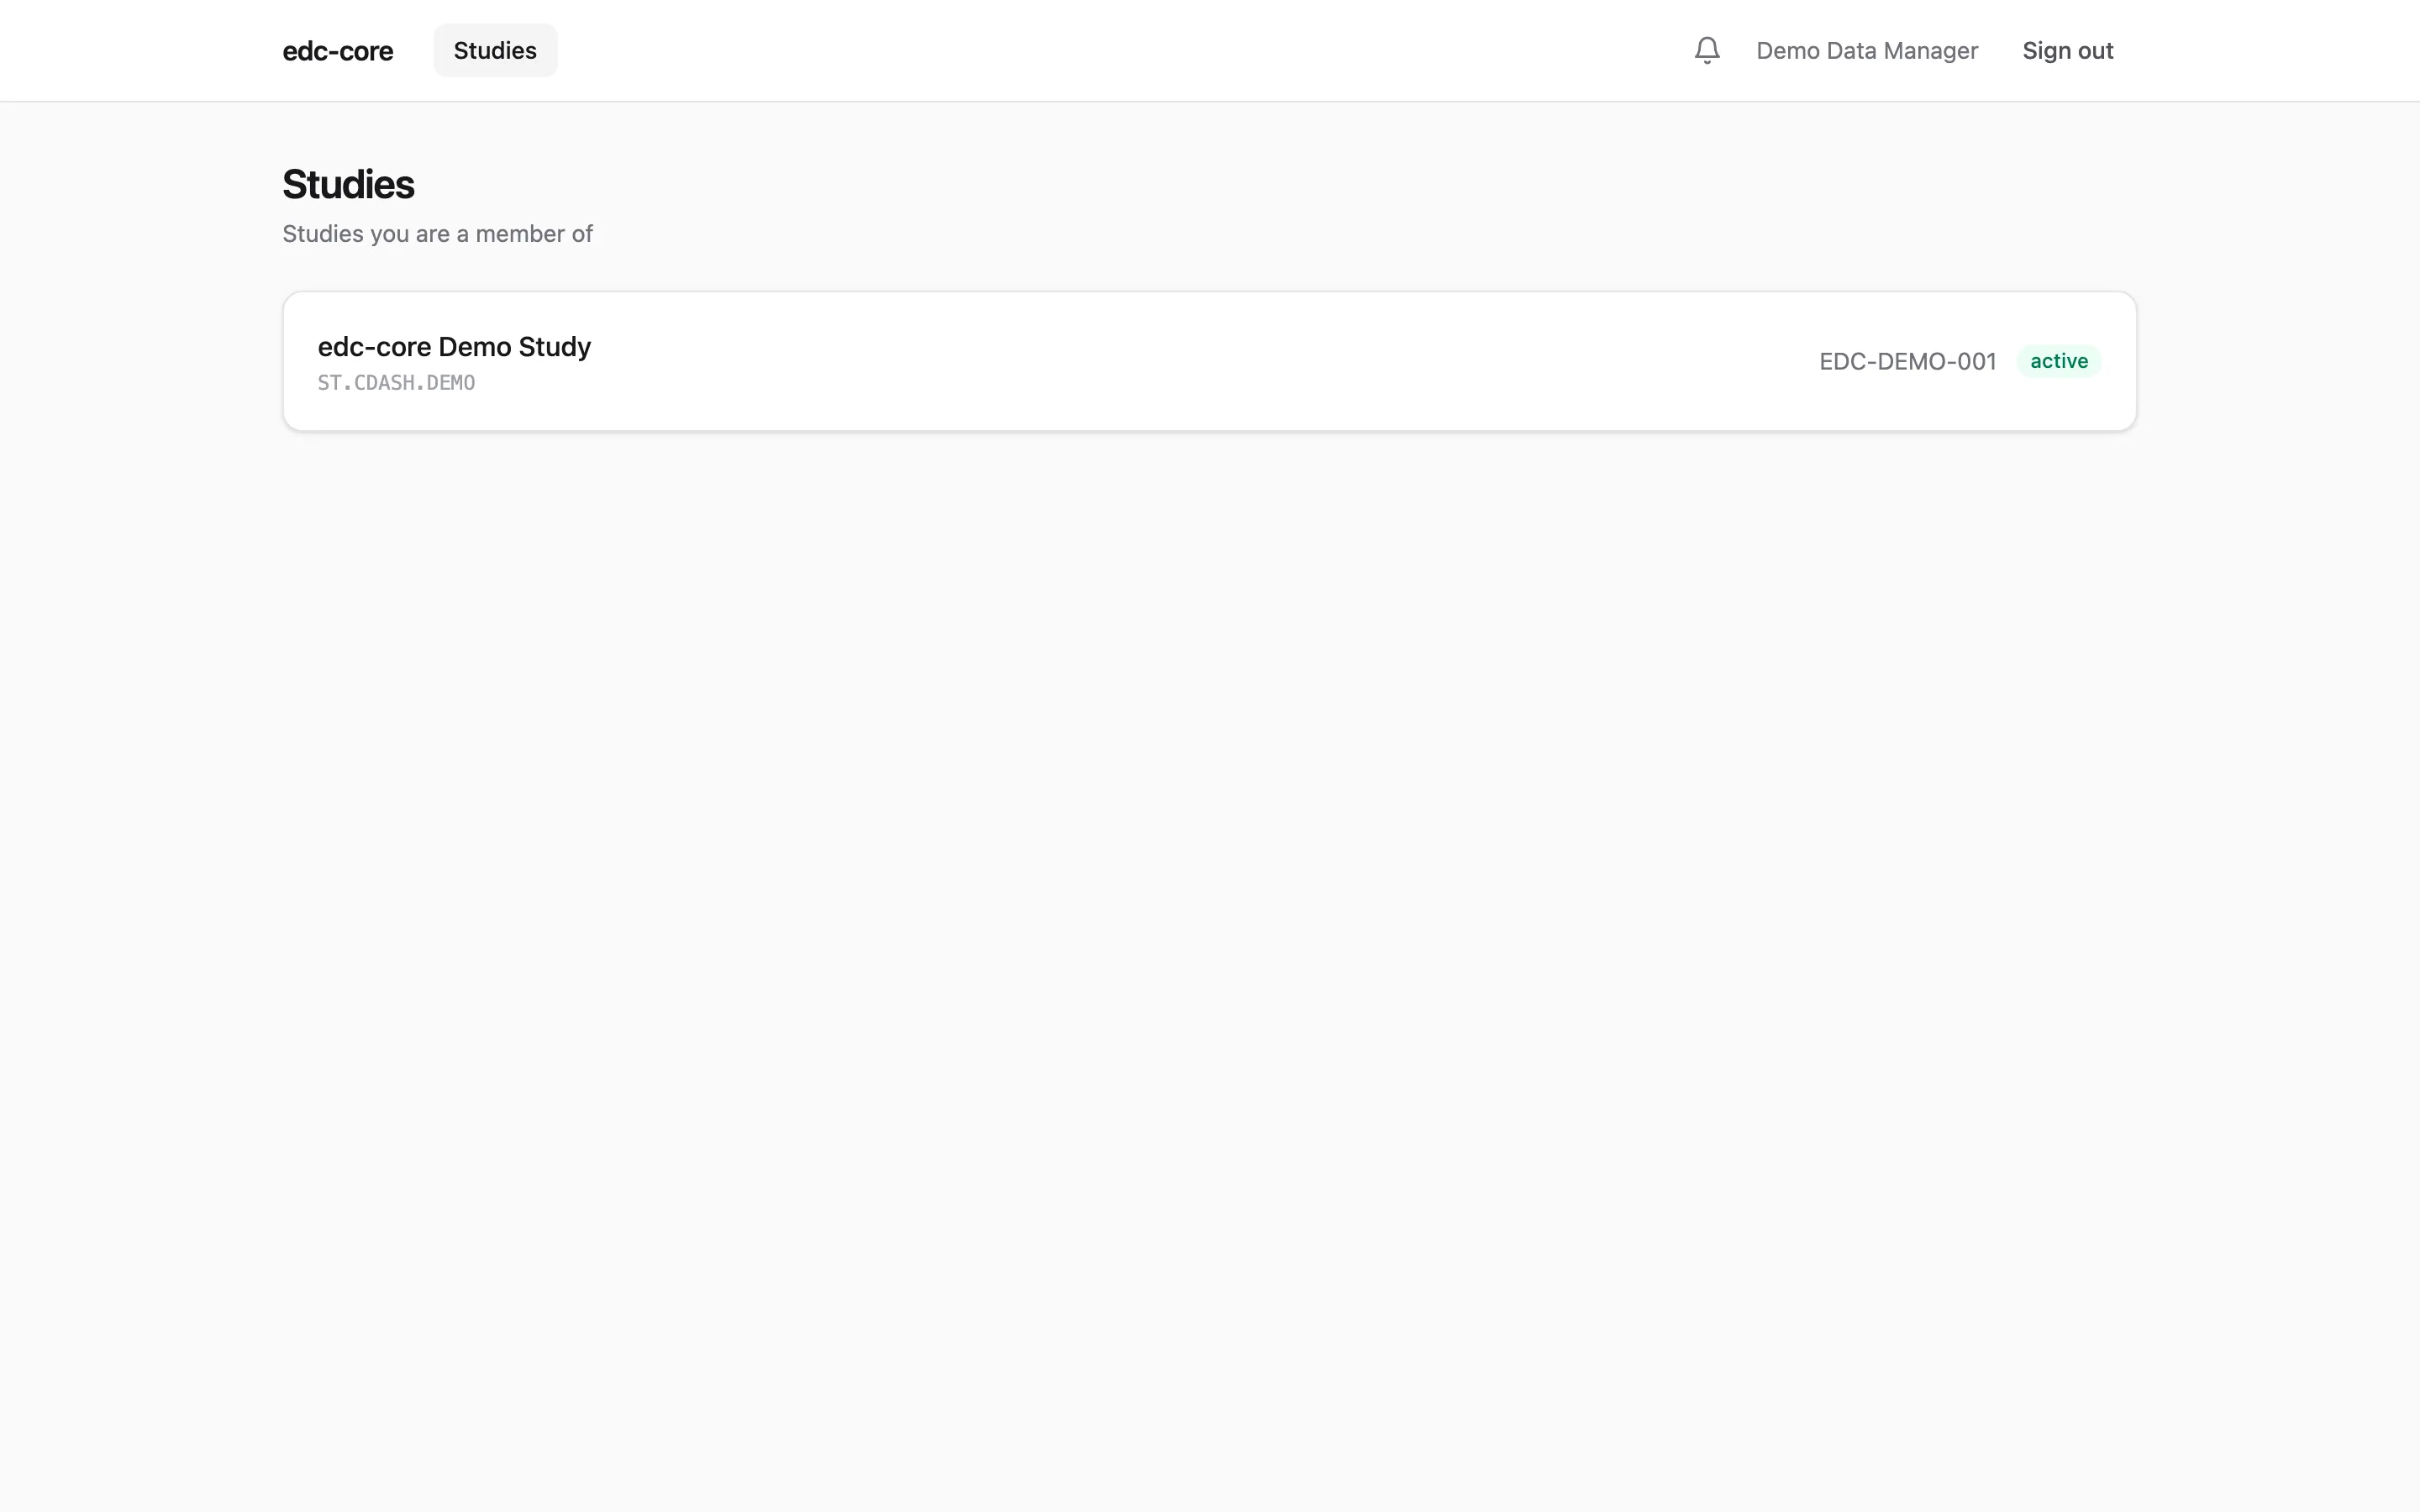
Section titled “1. See the study as a coordinator”Sign in as demo-coord. You land on the studies list. Users only see
studies they’ve been granted a role on, and site-scoped roles only see their
site’s subjects.
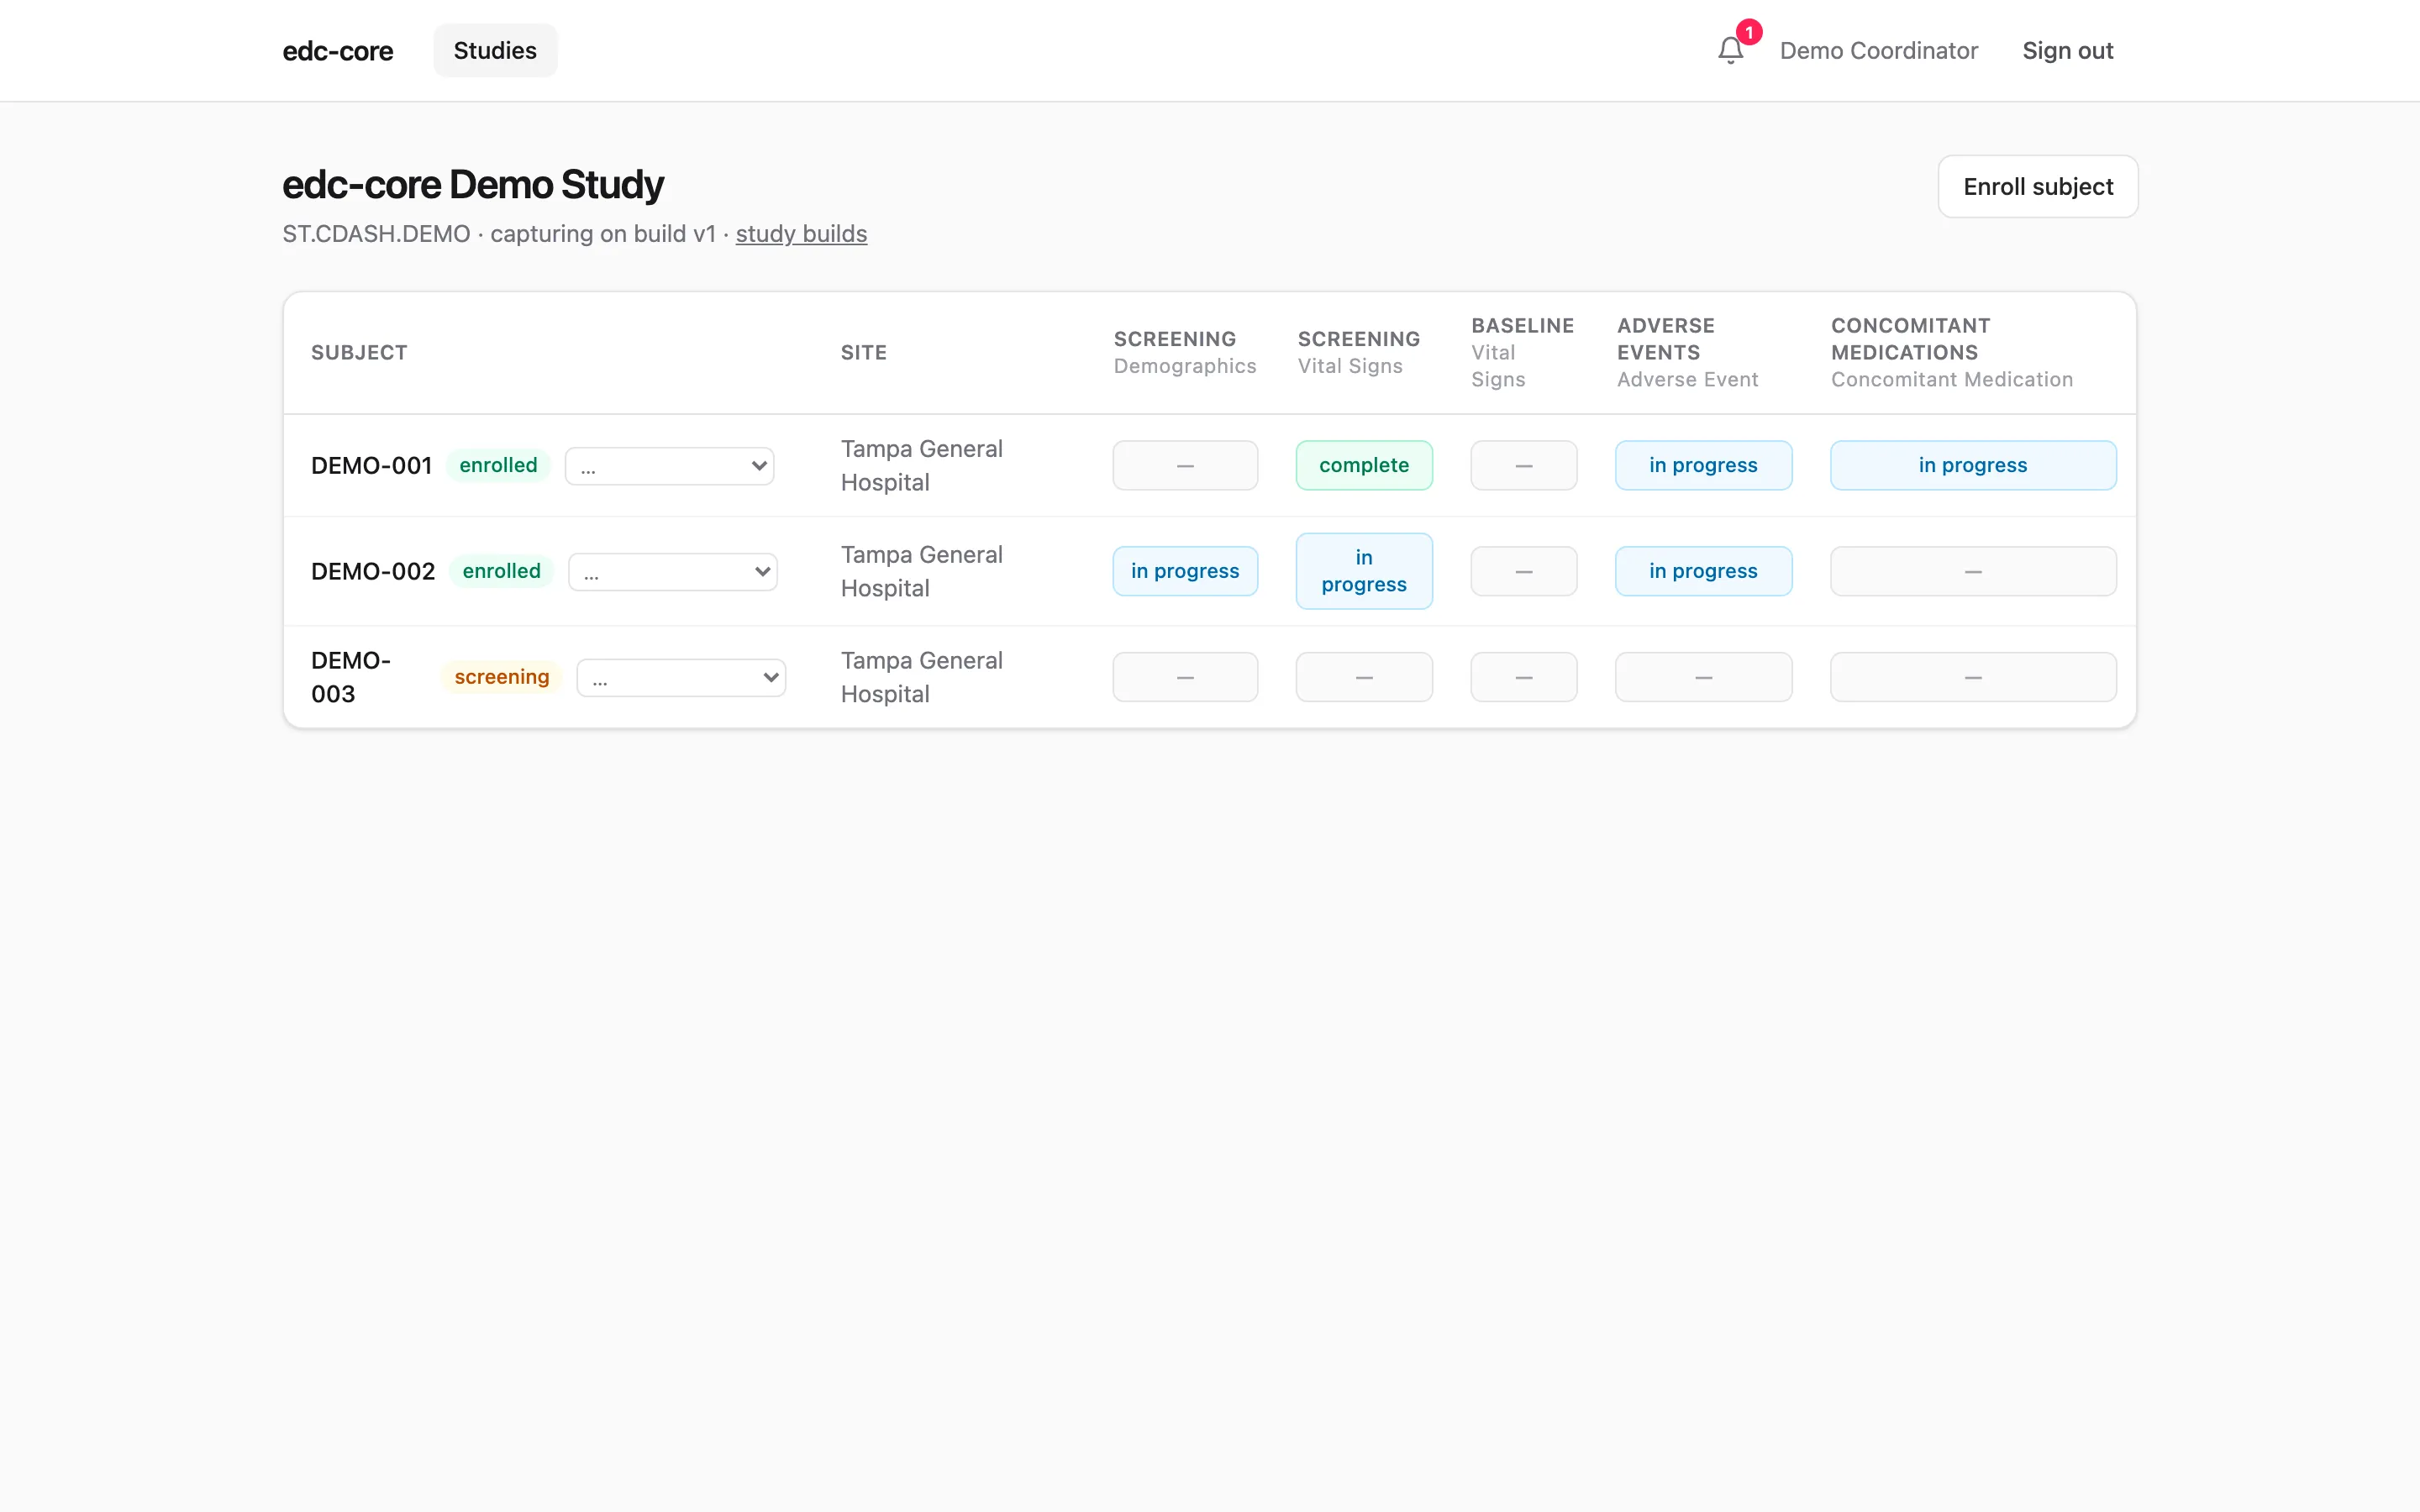
Open the study, then subjects. The subject matrix shows every subject × event × form and its workflow state at a glance, with each subject’s lifecycle status (screening, enrolled, completed, withdrawn) badged next to their key:
Full guide: Data capture.
2. Correct data and watch the query close itself
Section titled “2. Correct data and watch the query close itself”DEMO-002’s Vital Signs form is in progress with 1 open query: the seeded systolic blood pressure (62 mmHg) failed the plausible-range edit check, which automatically raised a system query.
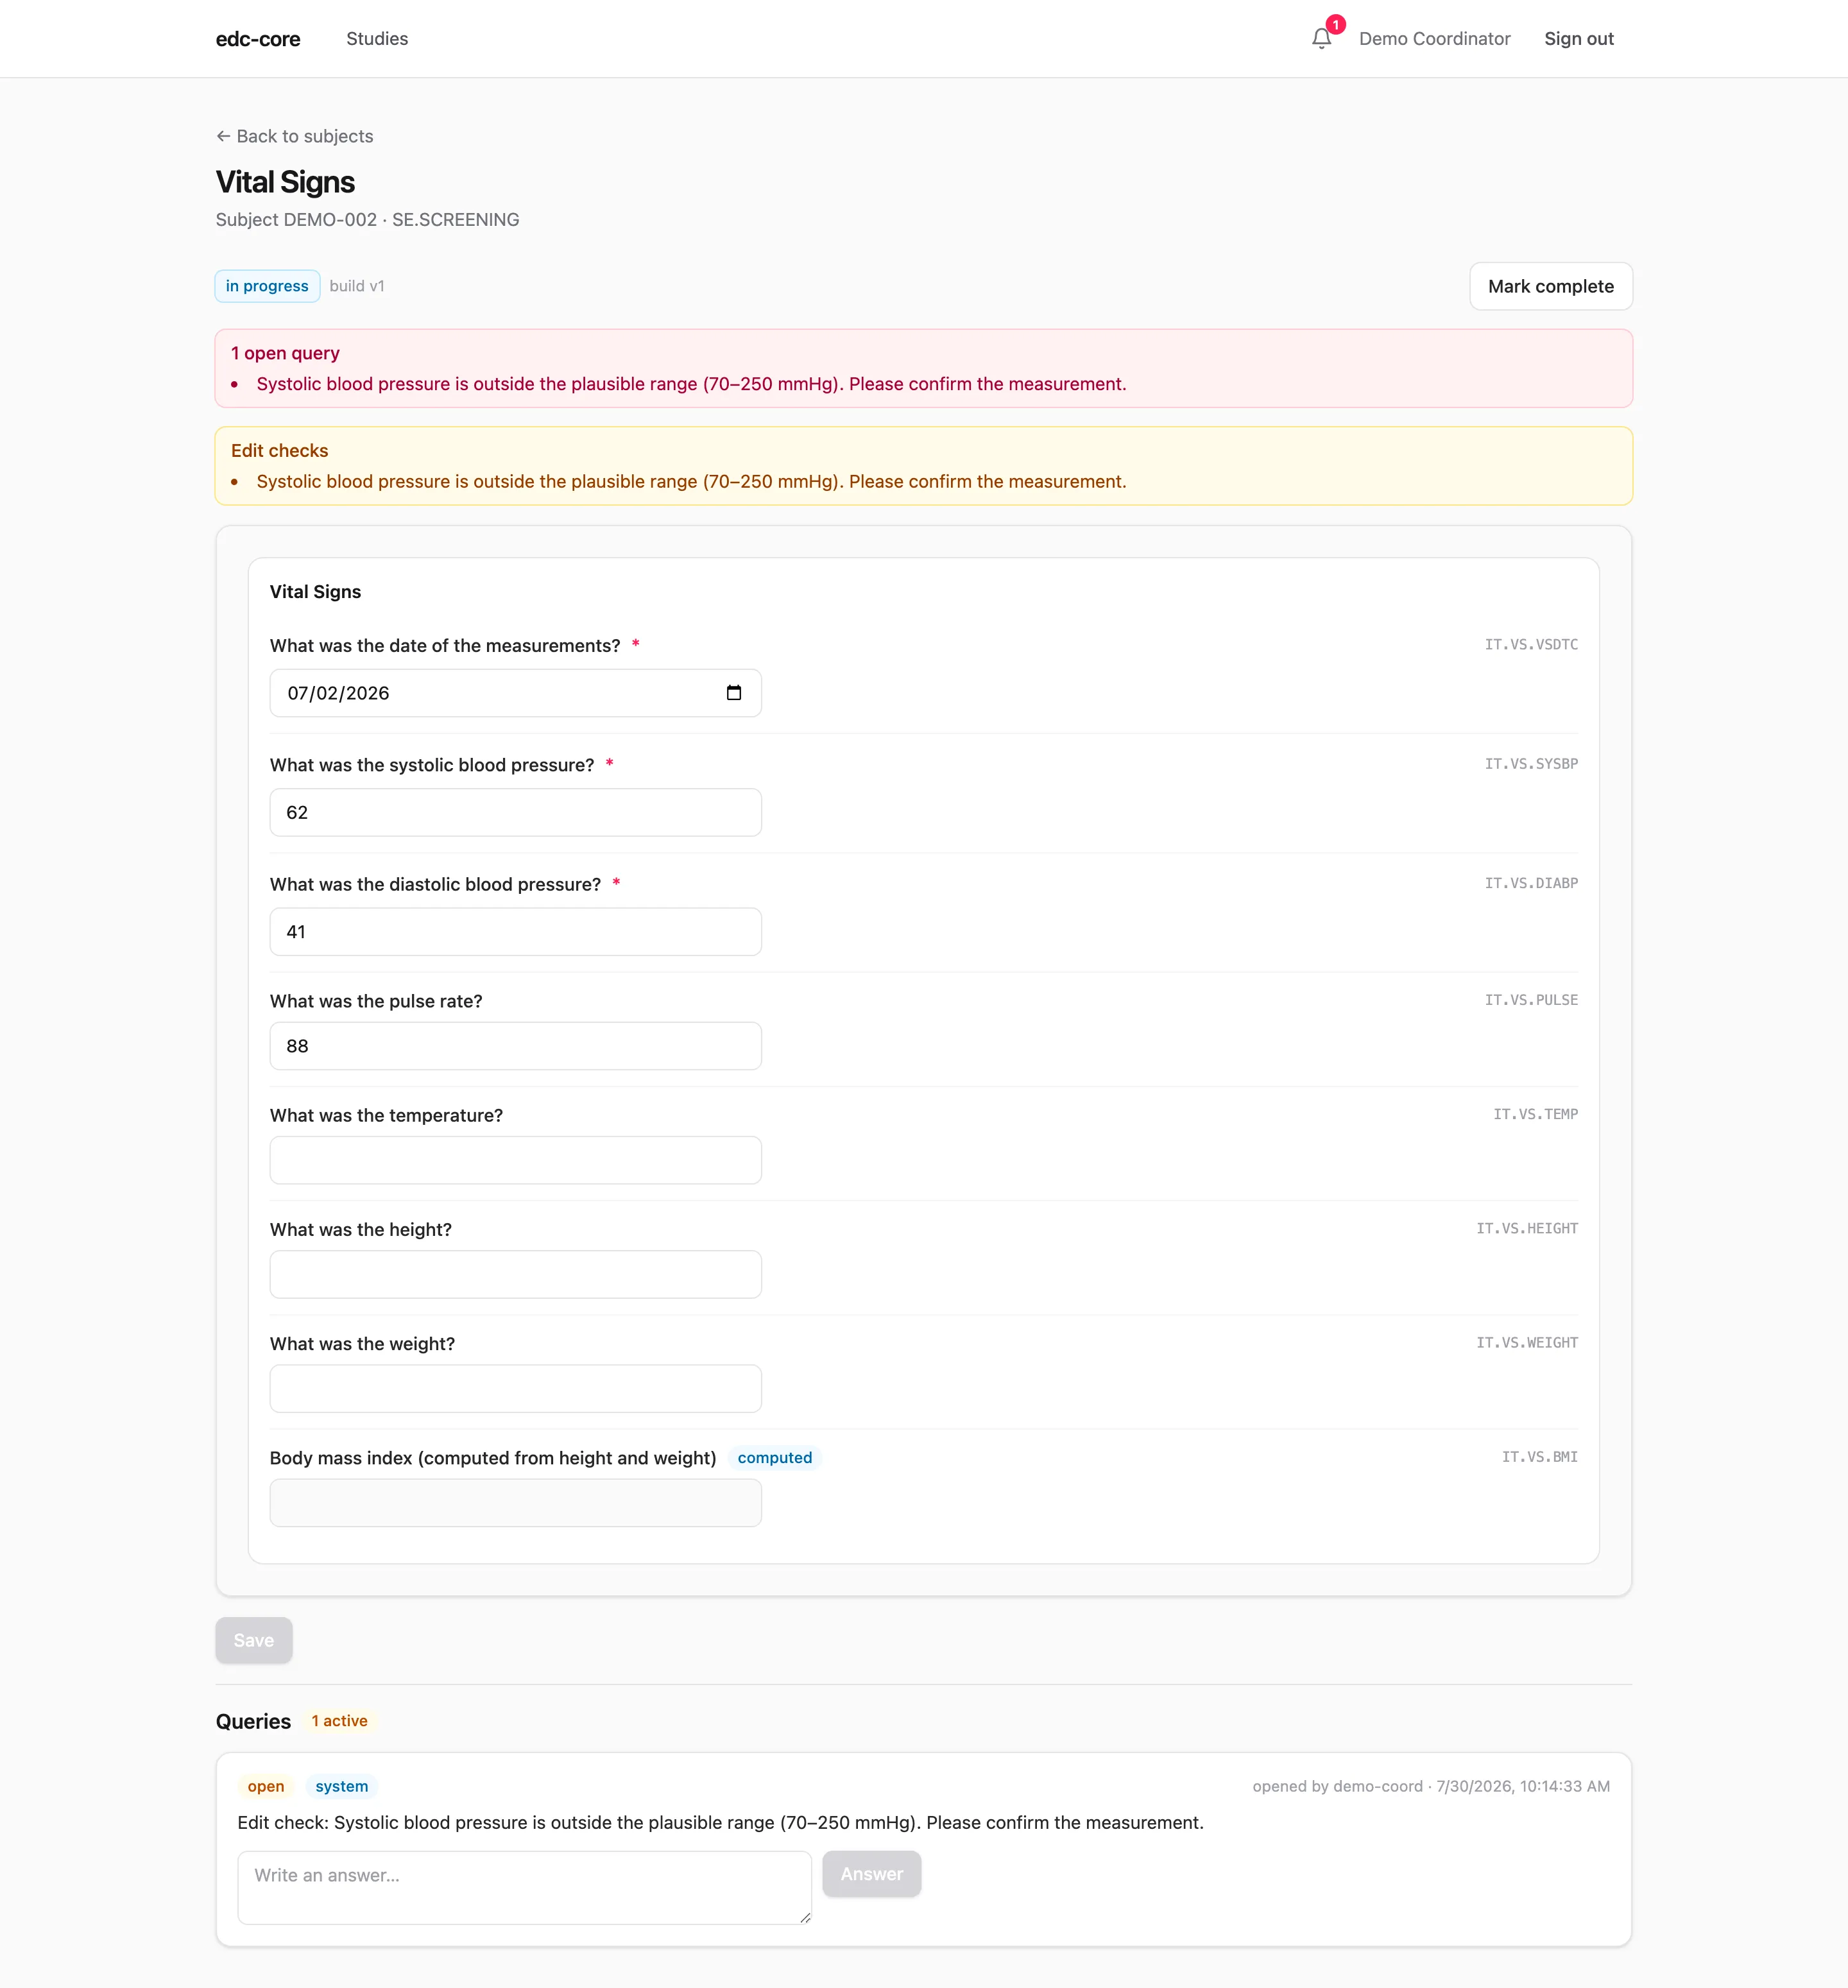
Enter a plausible value (say 118) and save, providing a reason for change:
every modification to saved clinical data requires one, and the prior value
remains visible in the audit trail forever. The edit check now passes, and the
system query closes automatically.
Edit checks are JSONata expressions defined in the study build. They run client-side for instant feedback and server-side as the source of truth. Checks can also read the subject’s other forms (an AE onset date against the visit date, say); those run server-side only and come back marked checked on save. See cross-form checks.
The demo study’s forms are dynamic, too. On the Demographics form, the pregnancy-test question only appears while the subject’s recorded sex allows it — record male and it vanishes; and on Vital Signs, the BMI field carries a computed badge: it fills itself in from height and weight, and the server recomputes and audits it on every save. Try changing a saved sex from female to male: the recorded pregnancy result is kept, flagged not collected, and a system query stays open until you clear it.
Checks can span forms, too: the demo build compares each adverse event’s onset date against the informed consent date on Demographics. Try it on DEMO-002:
- On the Screening Demographics form, record an informed consent date
of
2026-07-01and save. Nothing fires: the seeded adverse event (“stomach ake”) started on 2026-07-04, after consent. - Open that adverse event from the Adverse Events log and change its
start date to
2026-06-28, giving a reason for change. The edit-check panel flags it, marked checked on save — a check that reads another form runs only on the server — and a system query opens here, on the AE form, where the problem is anchored. - Correct either form. Say the consent date was the error: change it to
2026-06-15on Demographics and save. Back on the AE form, the query has closed itself: a write to one form re-evaluates the checks that read it, wherever their queries live.
Full guide: Data capture for the entry side, Rules and derivations for authoring the checks and computations themselves.
3. Verify as a monitor
Section titled “3. Verify as a monitor”Sign in as demo-cra and open the same form. Mark it verified. The
workflow state machine (in progress → complete → verified → signed → locked)
is enforced server-side, so transitions are only offered when the role and the
current state allow them.
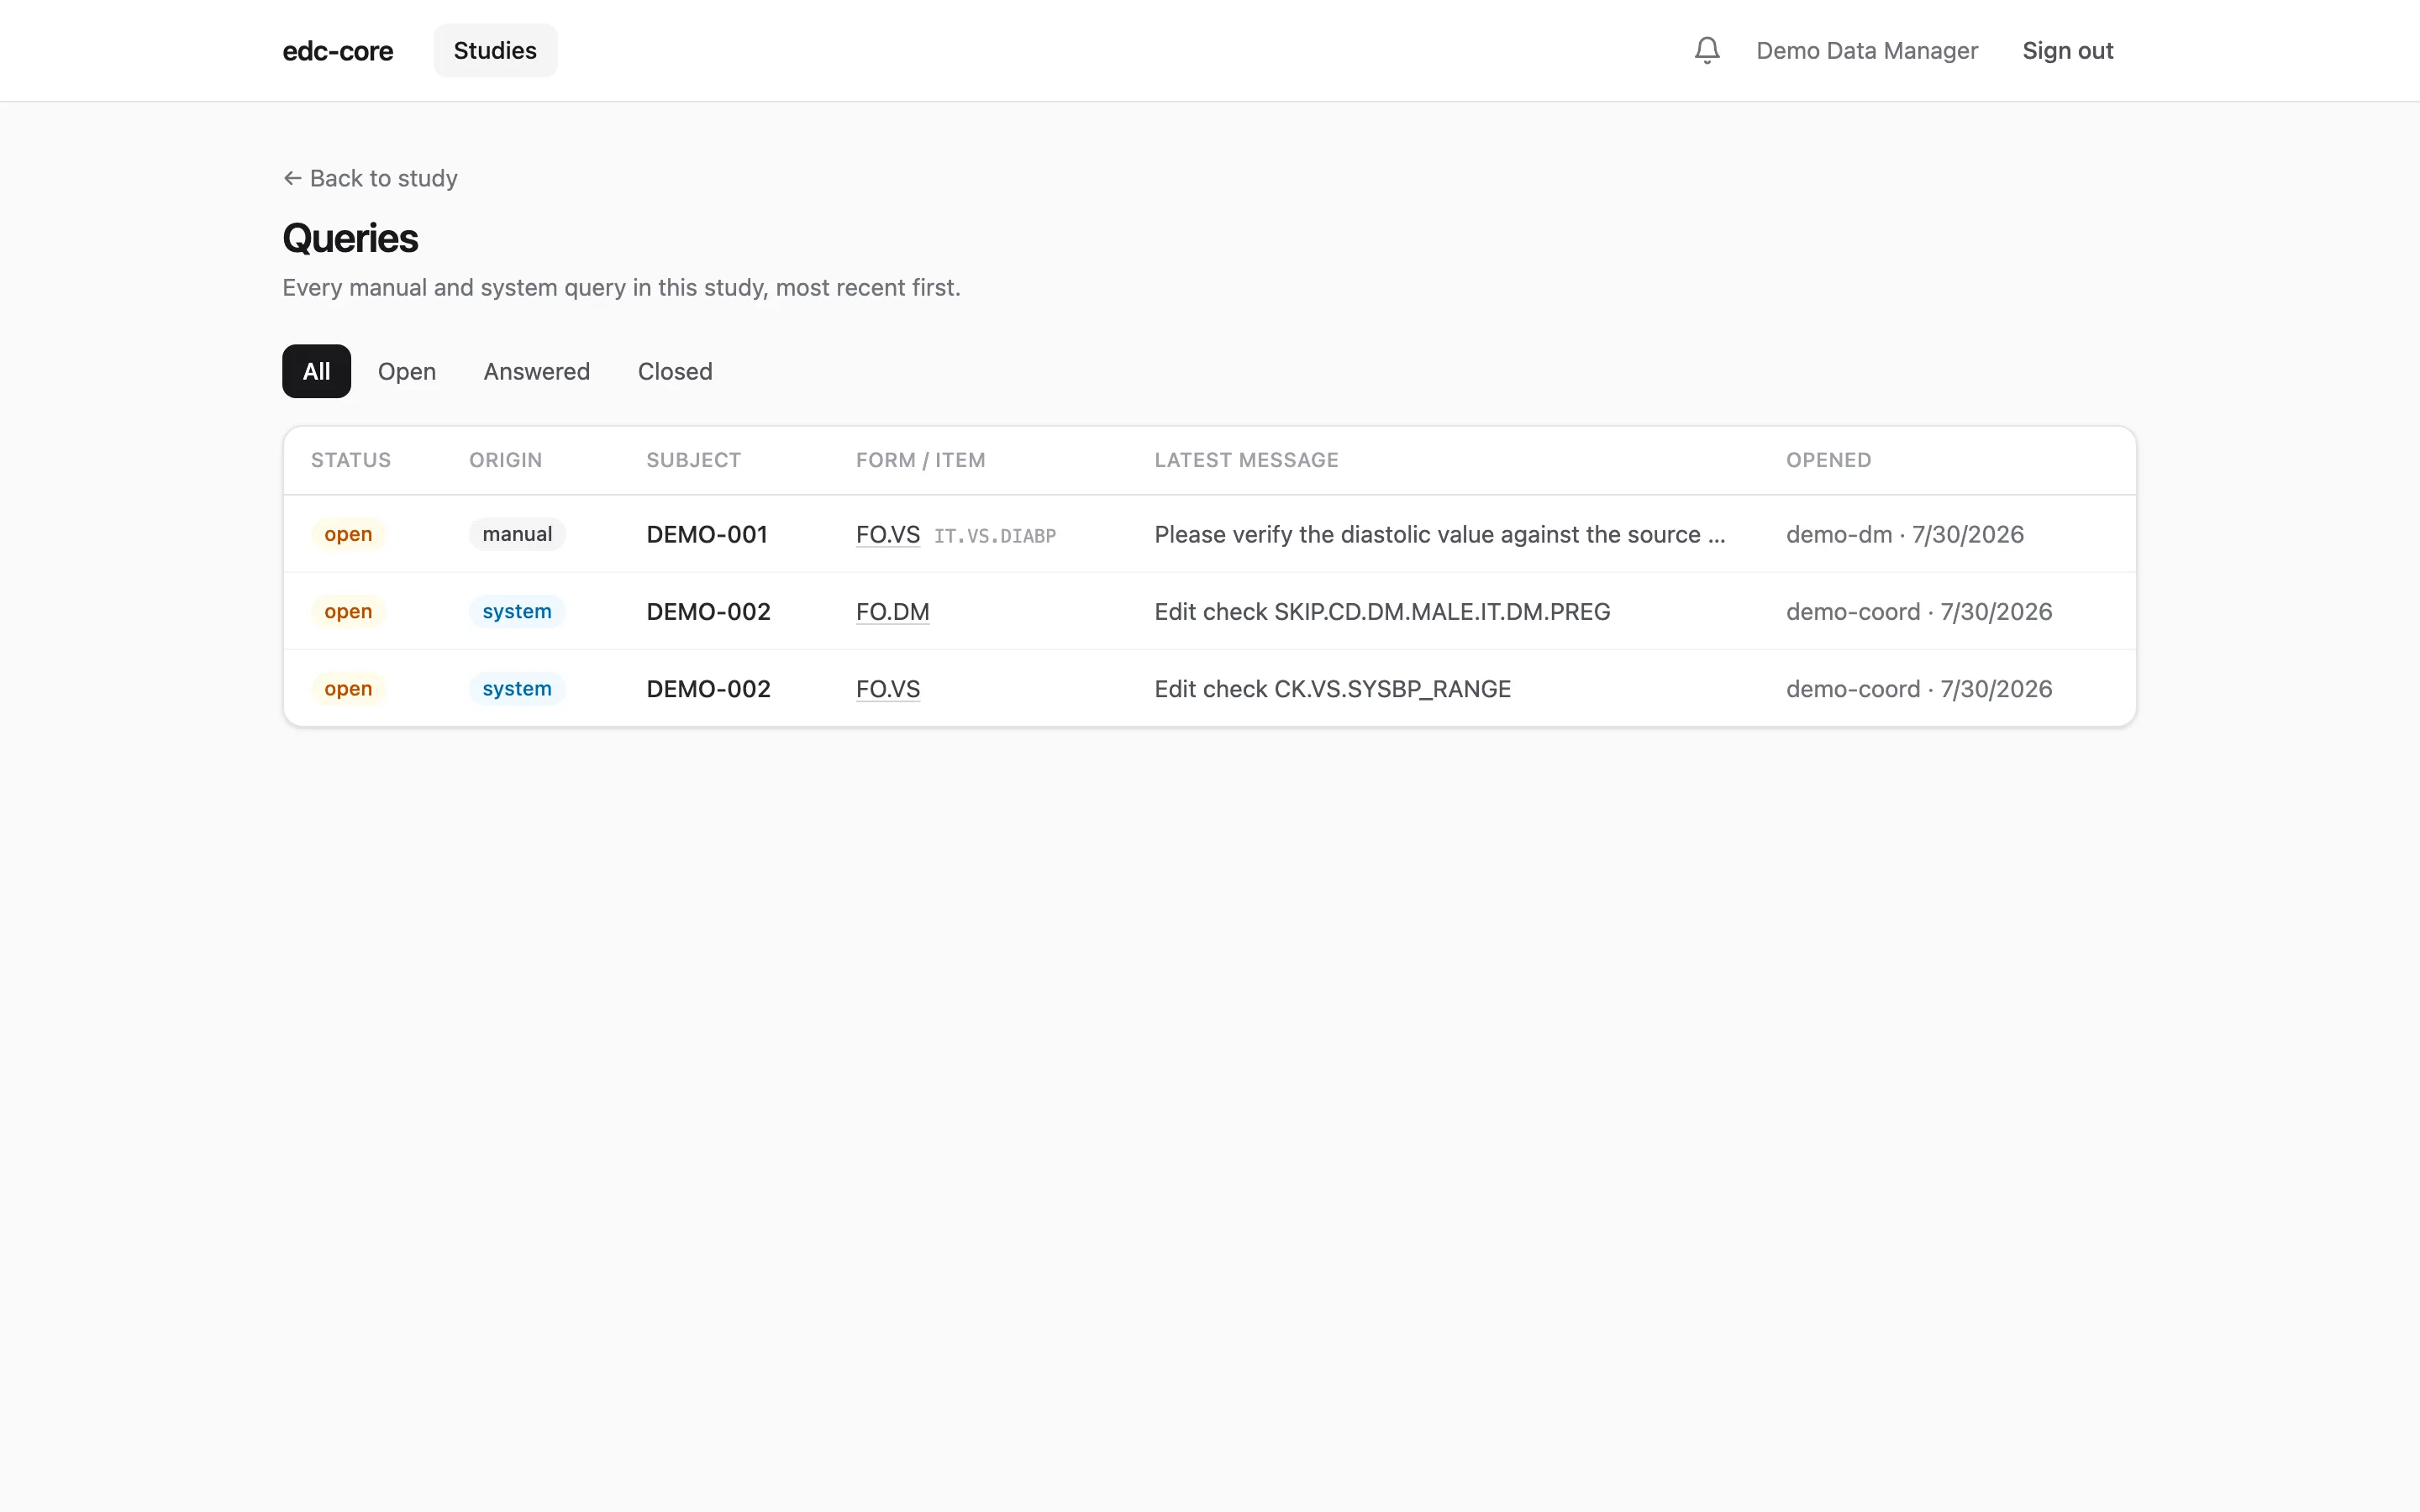
You can also review every query across the study from the queries dashboard:
Full guide: Review workflows and Notifications.
4. Sign as the investigator
Section titled “4. Sign as the investigator”Sign in as demo-inv, open the completed form, and sign it. Part 11
signing requires re-entering your credentials at the moment of signature; the
signature records name, date/time, and meaning, and is cryptographically bound
(SHA-256) to the exact record versions signed. If the form is later reopened
for editing, the signature is invalidated, visibly and irreversibly.
Full guide: Review workflows.
5. Review the audit trail
Section titled “5. Review the audit trail”Any create, change, or state transition you just performed is in the study’s audit trail: who, when, what changed, and why, filterable and exportable to CSV. Append-only storage is enforced by database triggers, so history cannot be rewritten even by a buggy application path.
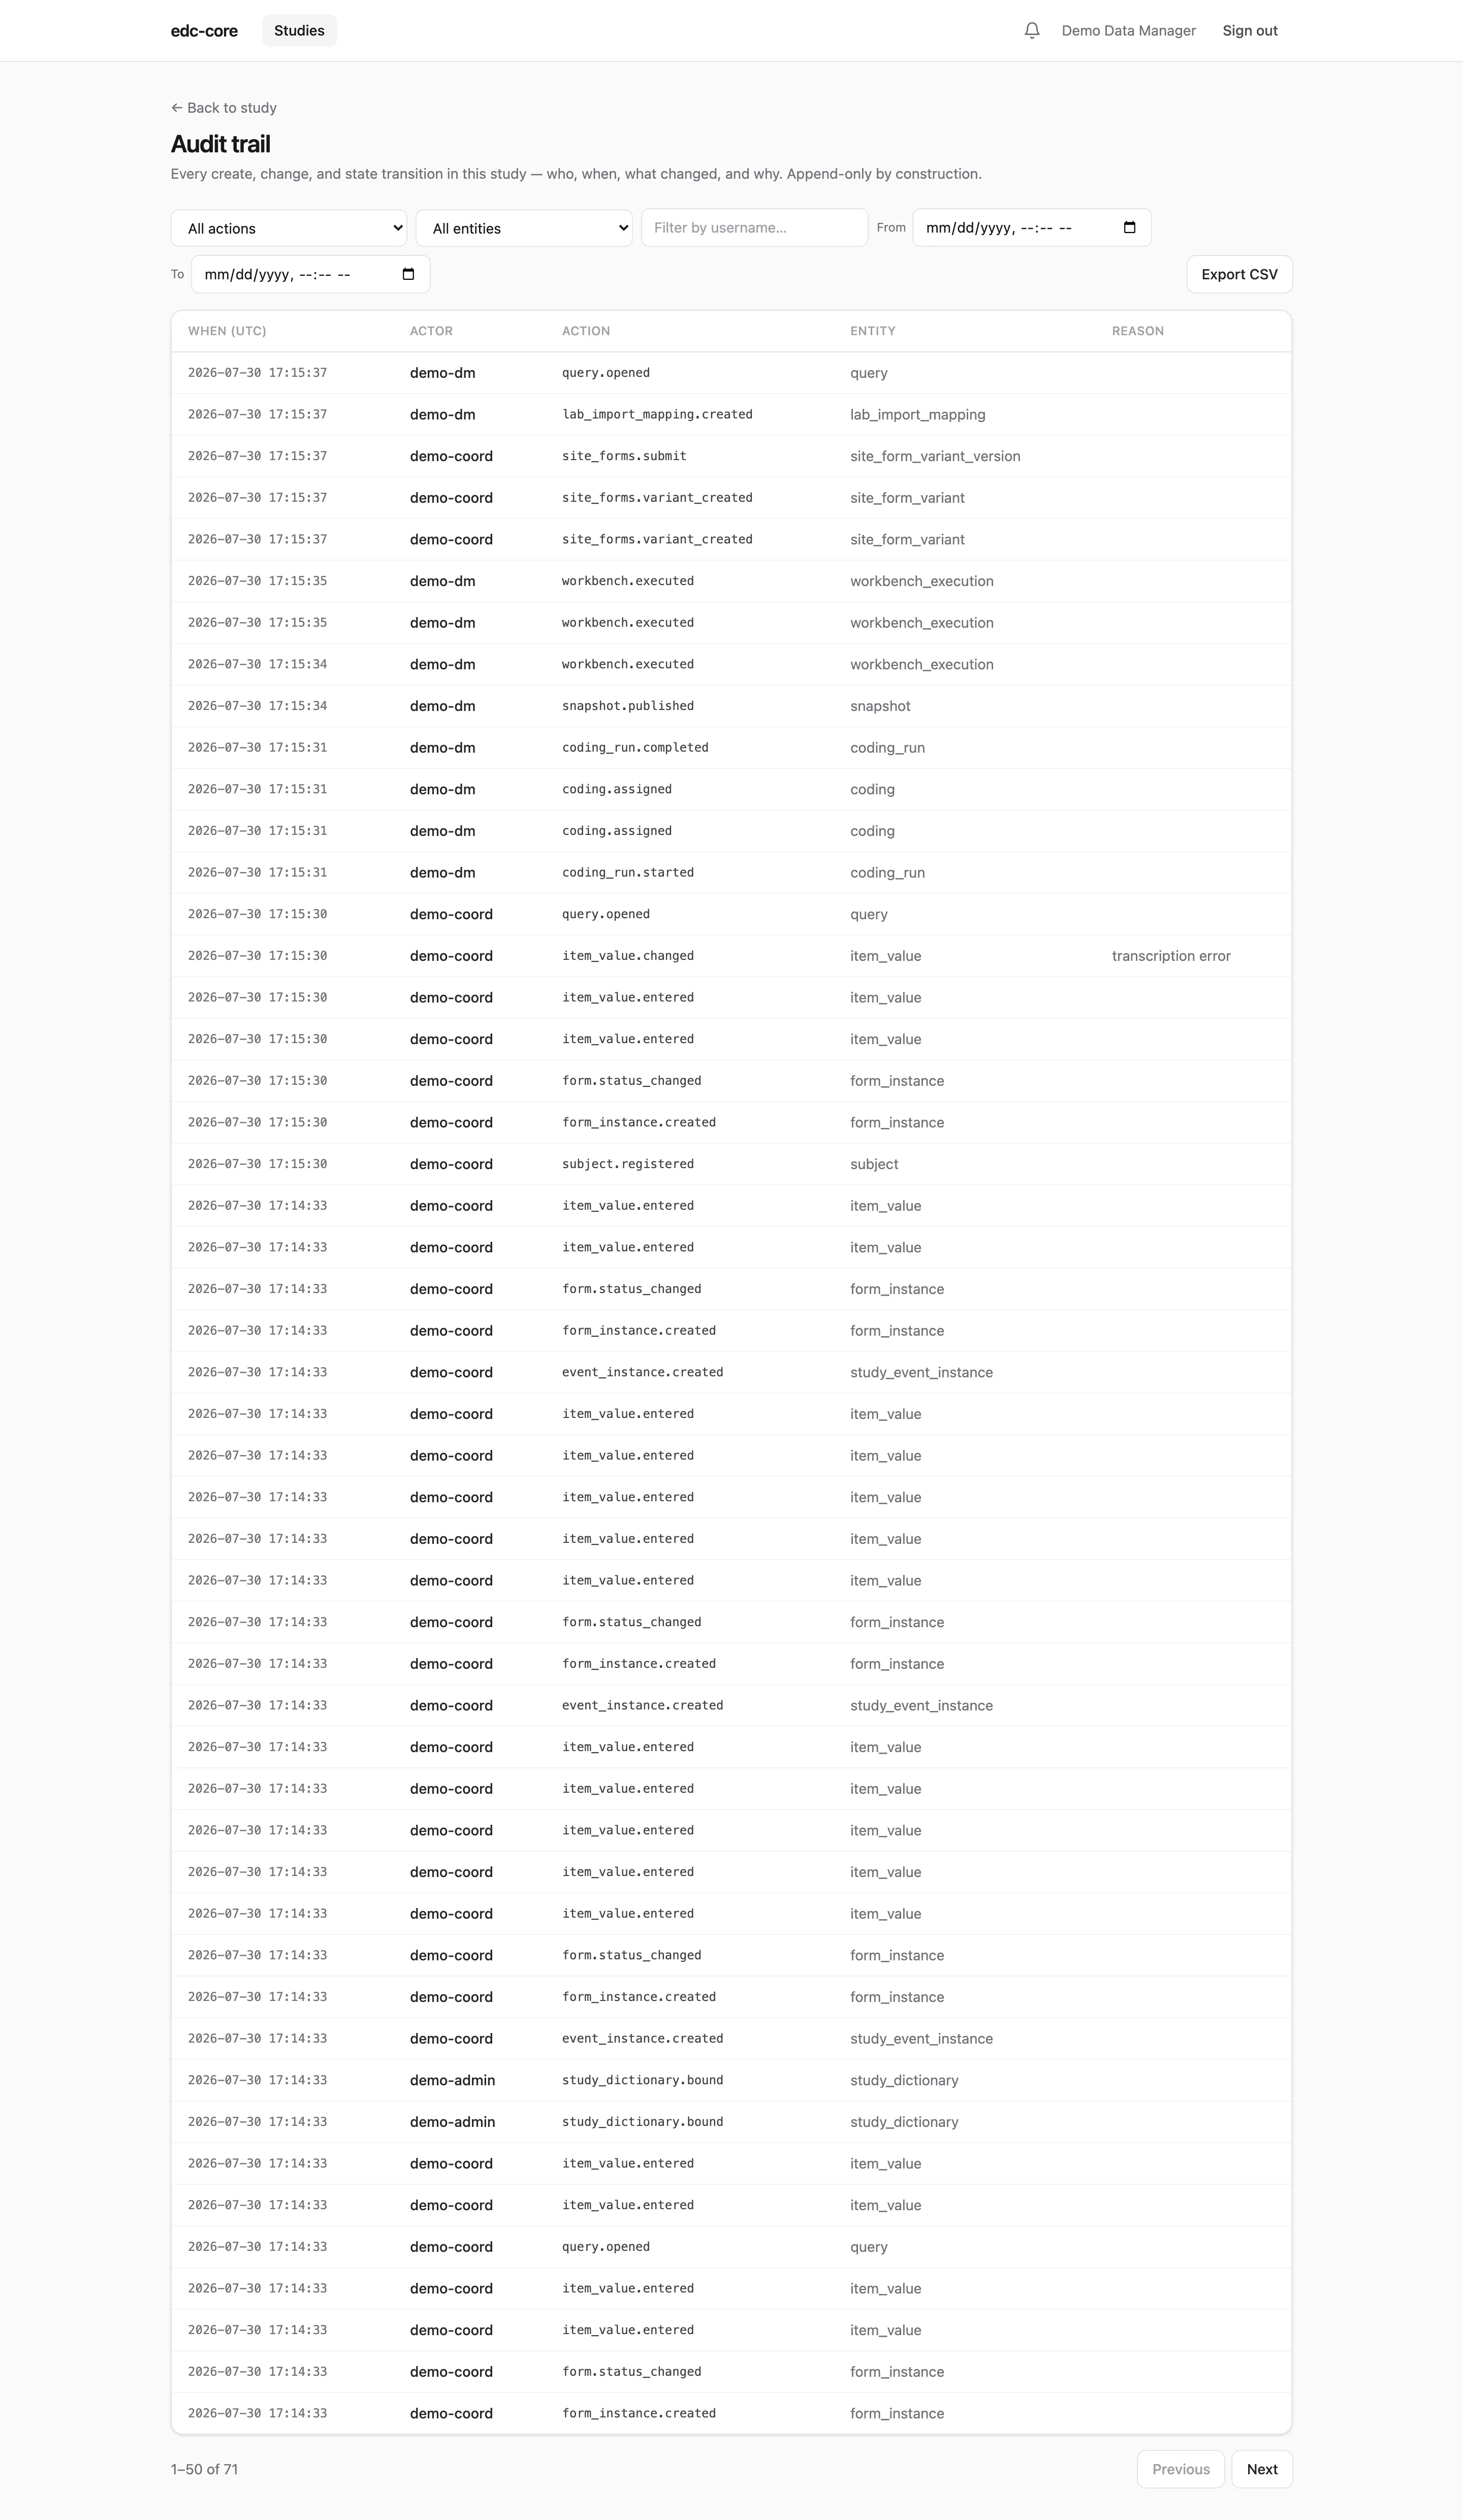
Full guide: Review workflows.
6. Publish a snapshot and analyze it
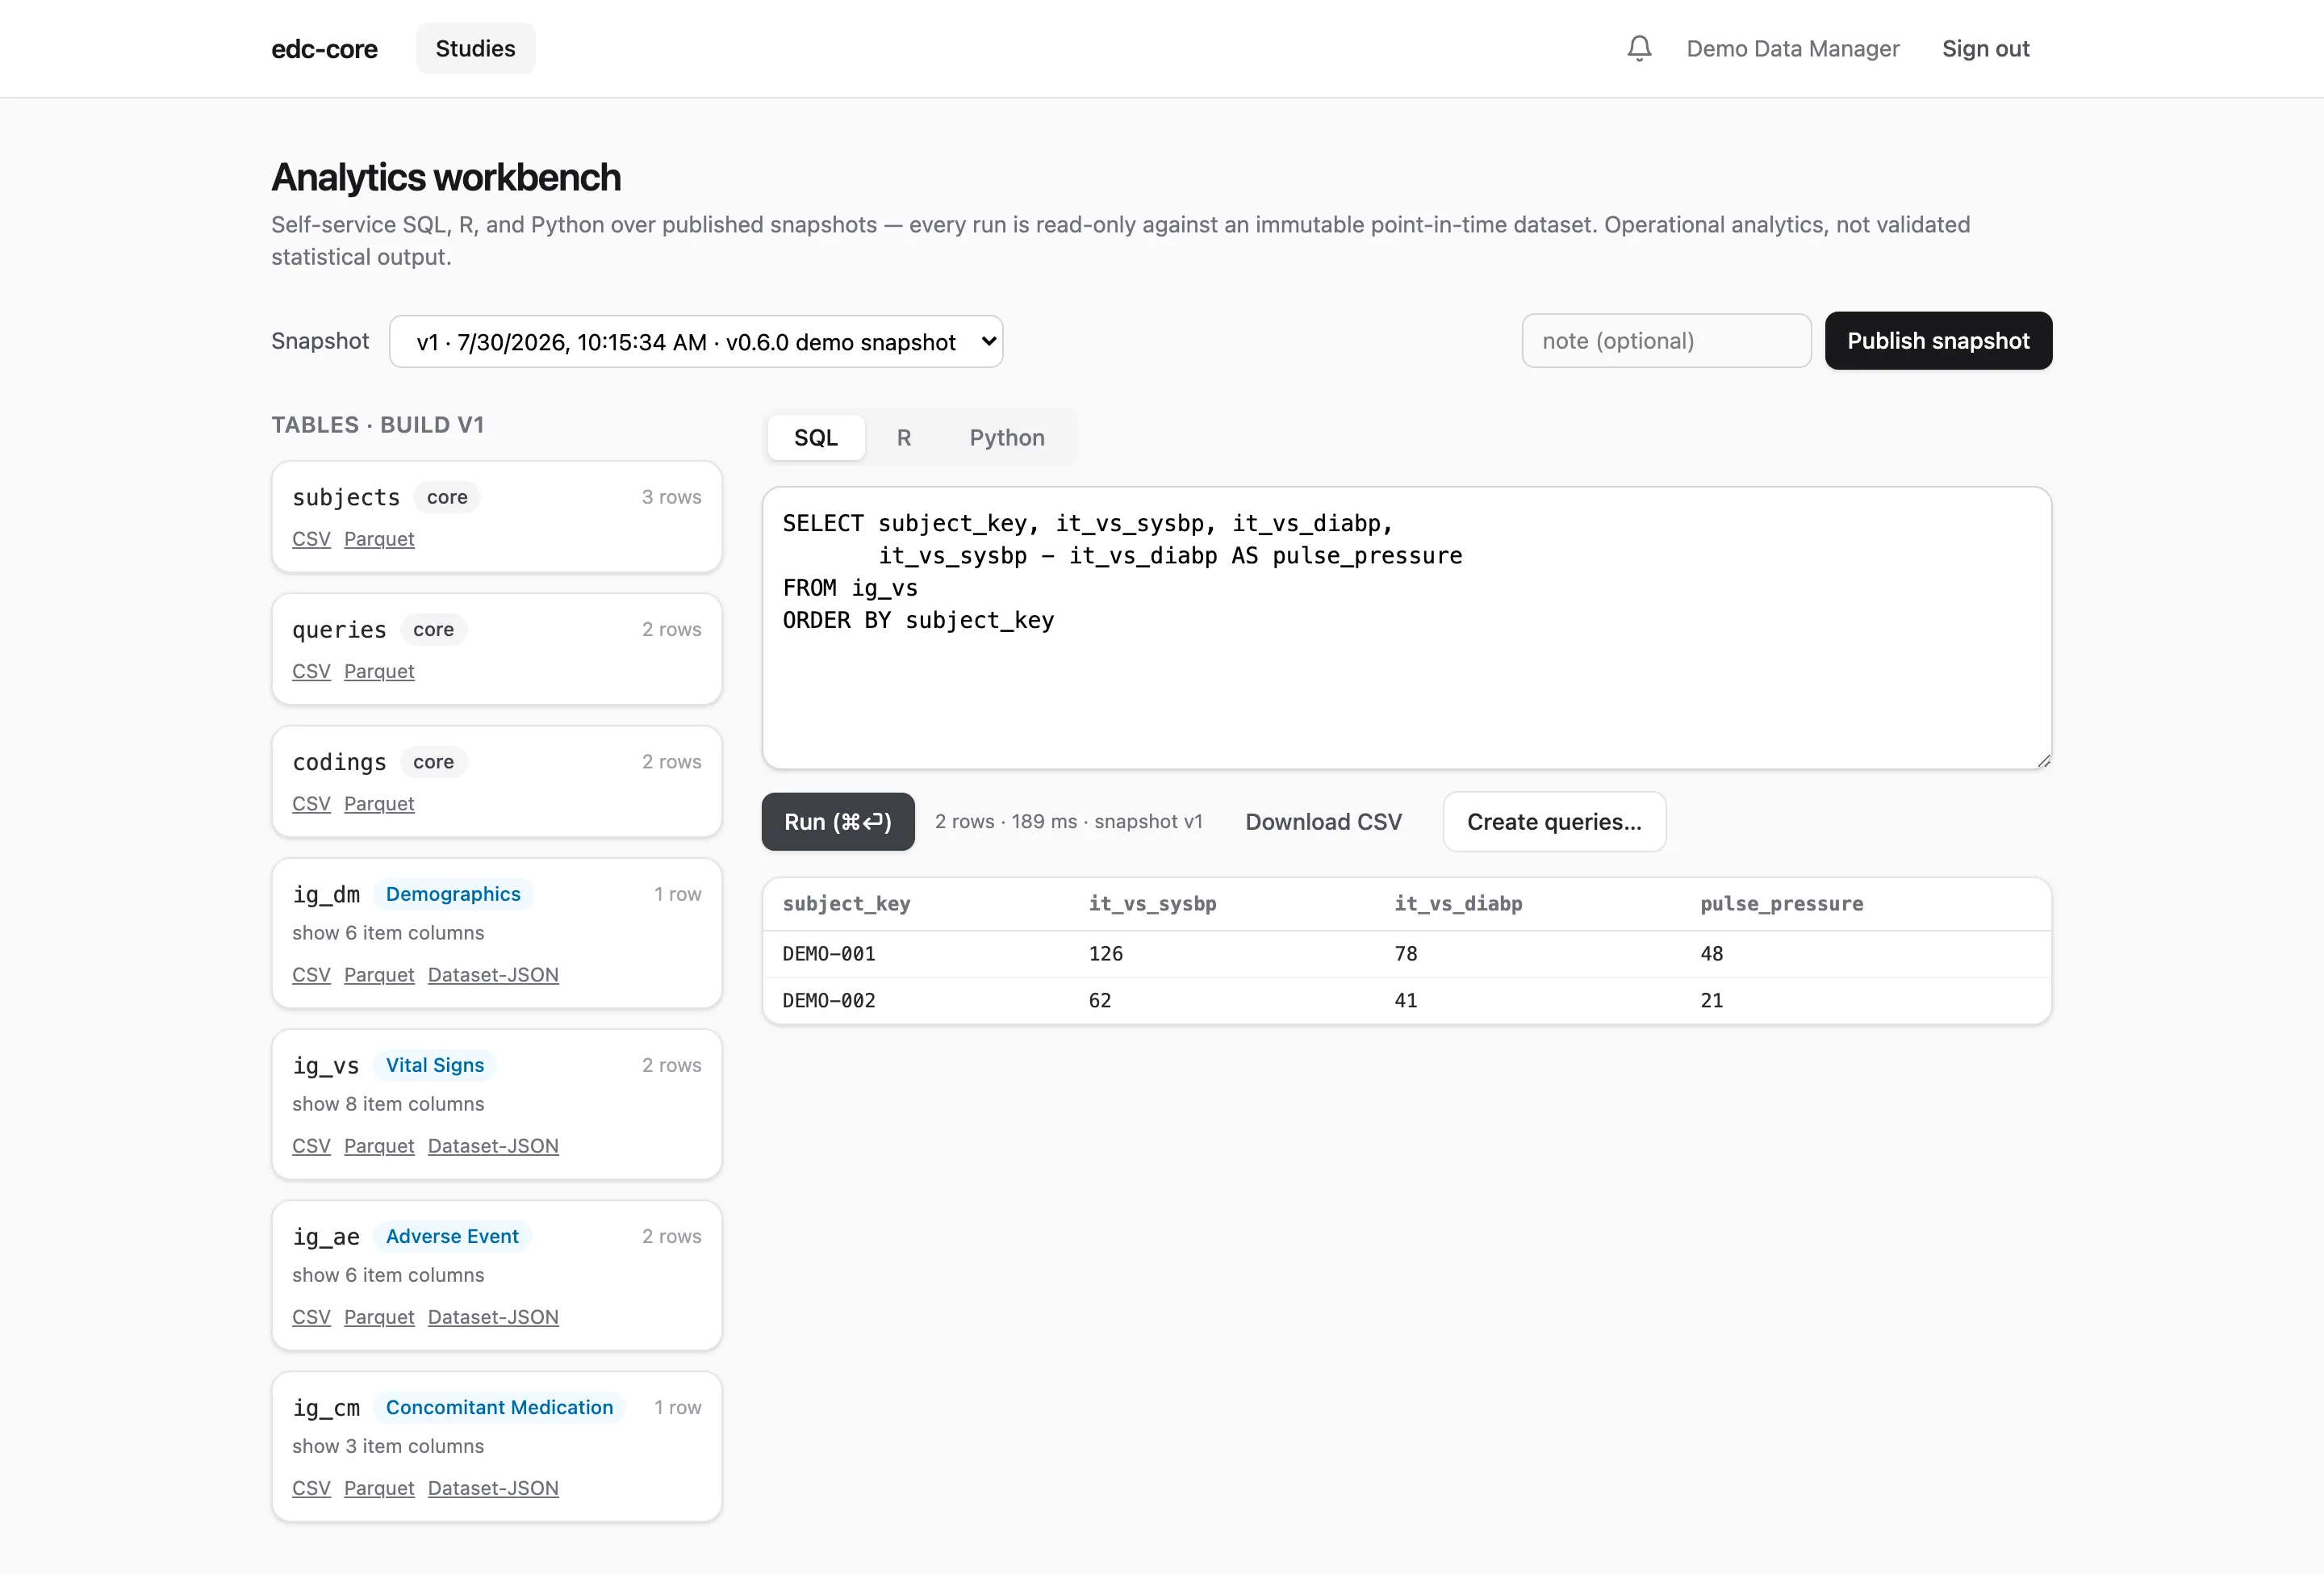
Section titled “6. Publish a snapshot and analyze it”Sign in as demo-dm and open analytics. Click Publish snapshot:
this pivots current study data into typed, analysis-ready tables (one per CDISC
item group, plus subjects and queries) in the study’s DuckLake lake. Each
snapshot is an immutable, point-in-time dataset: reruns against snapshot v1
return identical results forever.
Run SQL against the pinned snapshot:
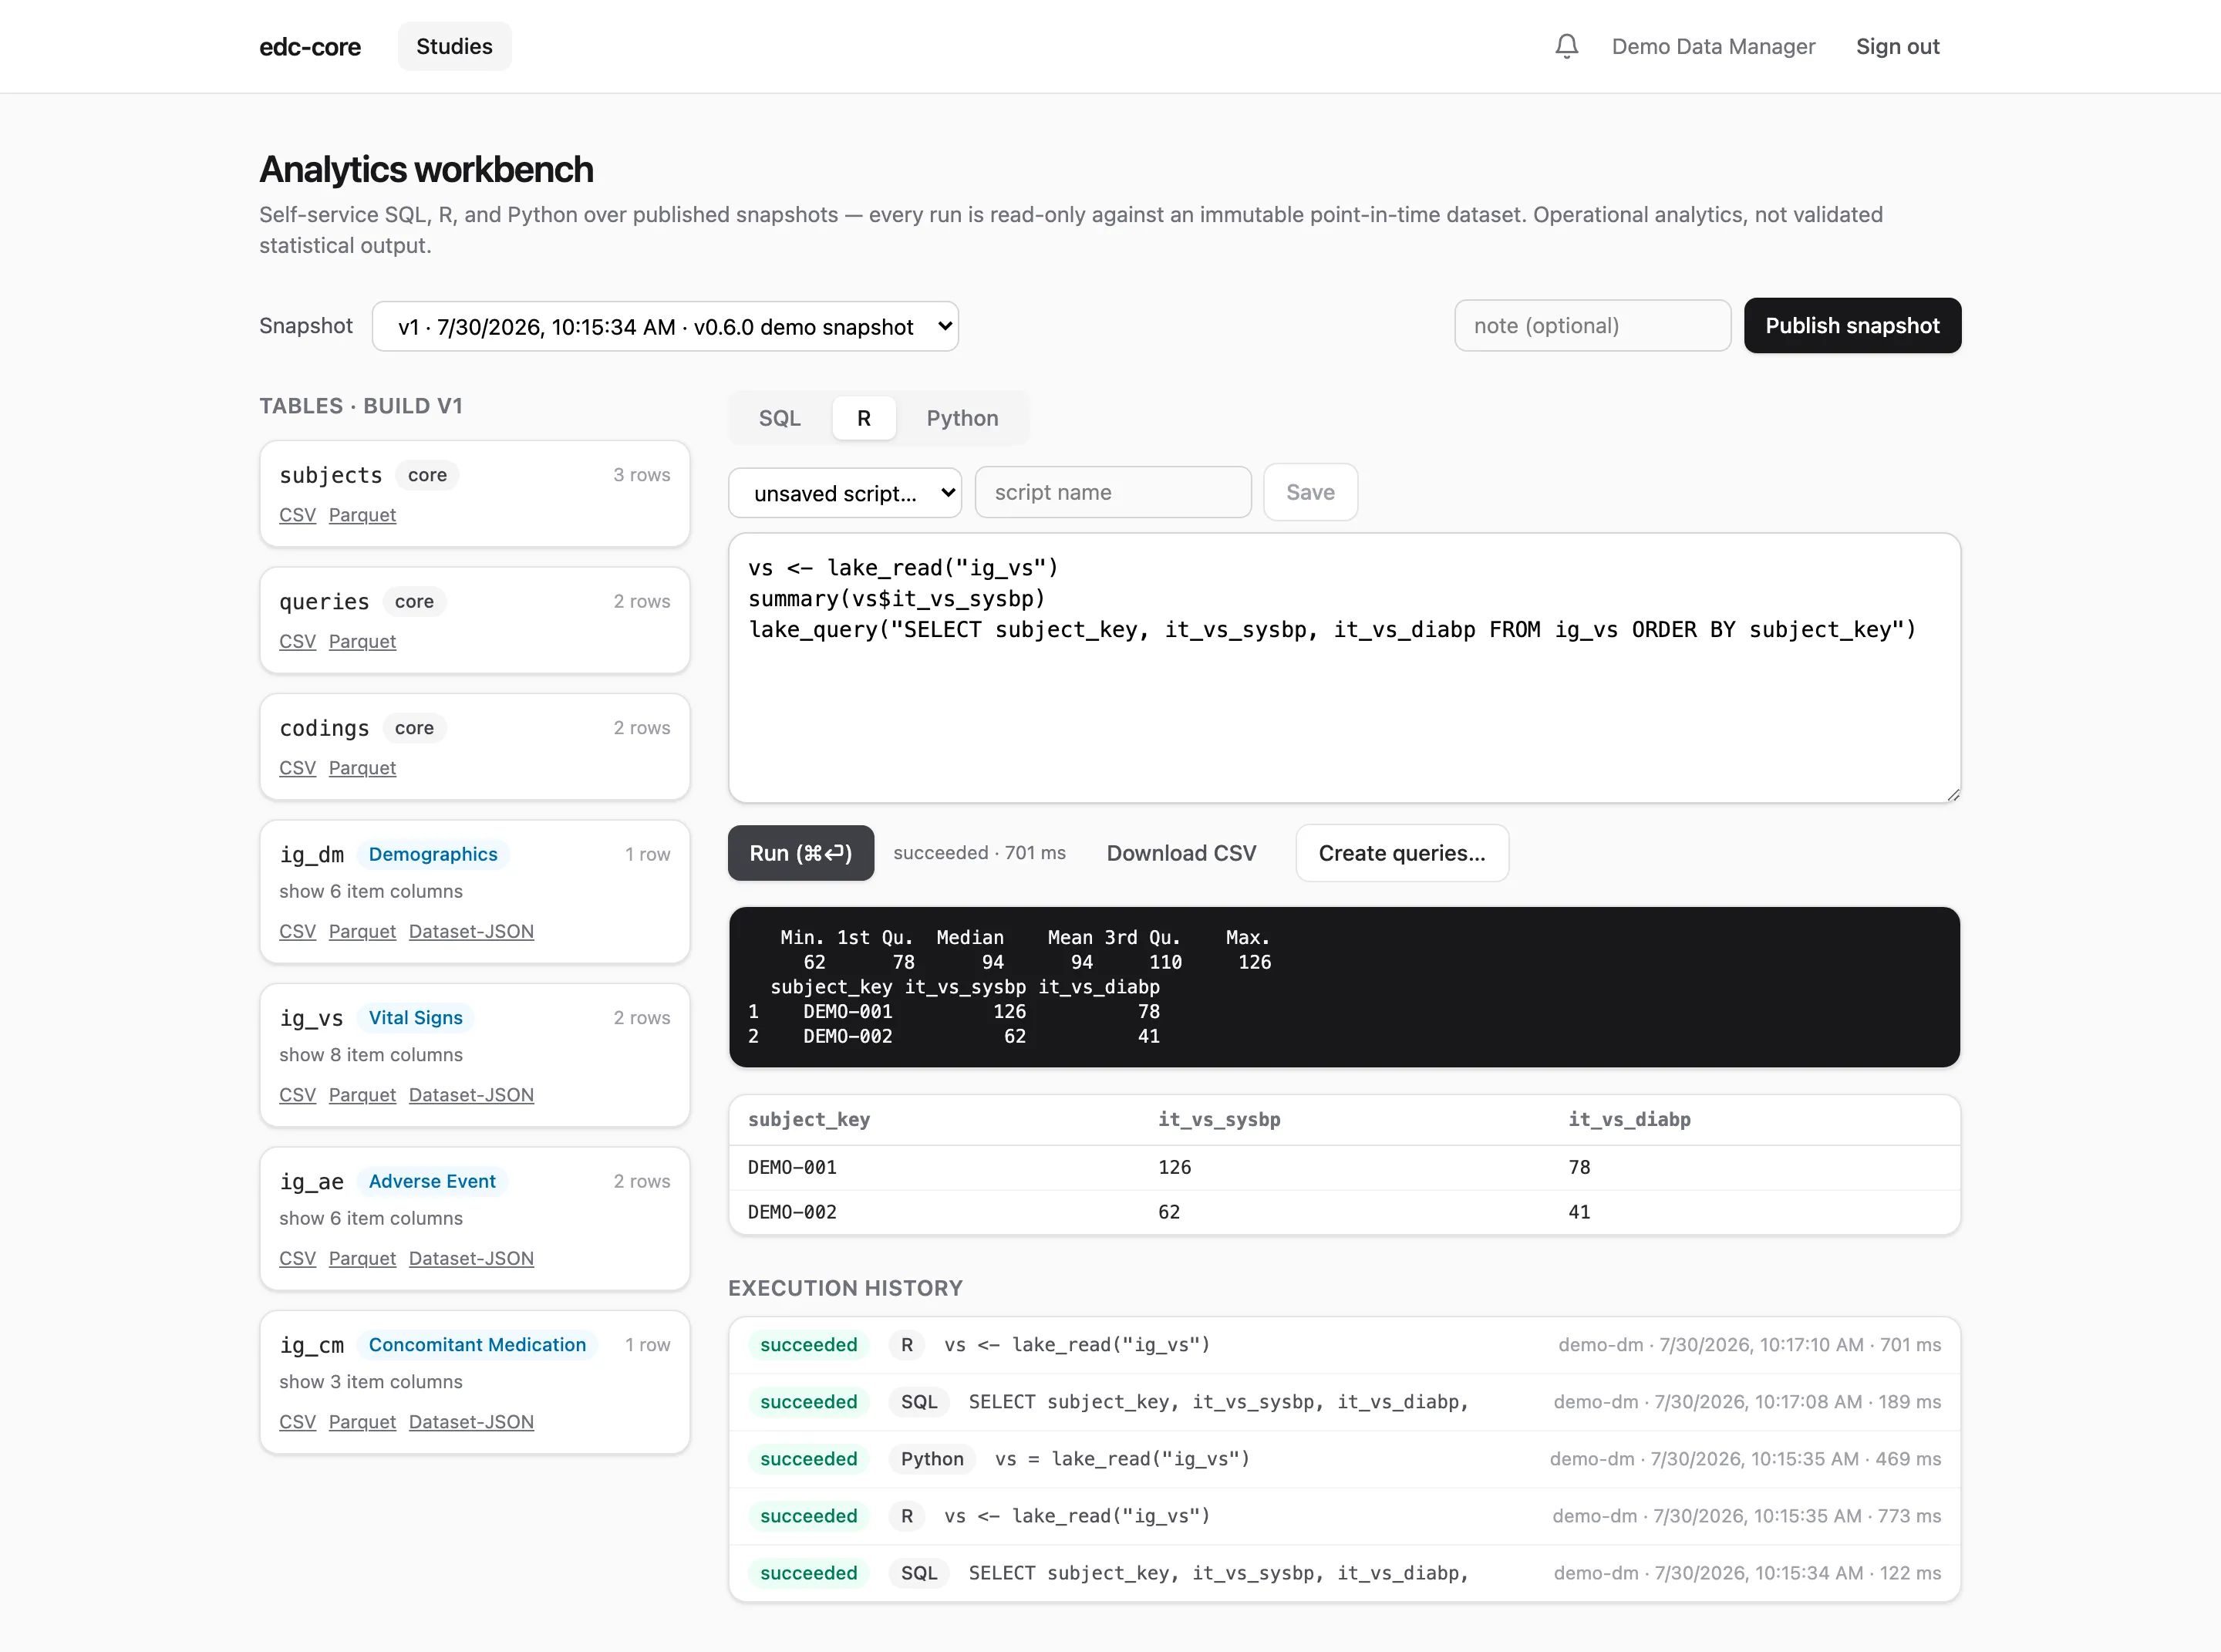
Or switch to the R or Python tab: scripts execute server-side in
sandboxed containers with lake_read() / lake_query() helpers (data.frames
in R, pandas DataFrames in Python), and every execution is recorded with its
code, logs, and results:
Then close the loop the way a data manager would. A listing that finds problems can raise queries without re-keying anything. Run:
SELECT subject_key, event_oid, form_oid, it_vs_sysbpFROM fo_vsWHERE it_vs_sysbp > 120Select the flagged rows and click Create queries…. The key columns map themselves, and a dry-run preview shows what each row will do before anything is written: create a query, or skip with a reason (already queried, value corrected since the snapshot, form locked). Confirm, and the queries land on the site’s forms as ordinary manual queries. The site hears about the batch once, and each query records the execution and snapshot that raised it. Run the preview again and every row now reports an existing query: the loop does not double-file.
Full guide: Analytics workbench, and From listings to queries for this workflow.
7. Export and archive
Section titled “7. Export and archive”From the analytics page you can export any snapshot table as Dataset-JSON v1.1 (the FDA-accepted exchange format), CSV, or Parquet, or download the study archive: a self-contained zip with the ODM study definition (XML + JSON), all datasets, the complete audit trail, the signature manifest, and a PDF casebook for every subject.
Full guide: Exports, casebooks, and the study archive.
That’s the whole loop: capture → clean → verify → sign → snapshot → analyze → archive, with every step audited. And it is a loop, not a line: the analysis step raises the next round of cleaning queries itself. For details on any piece, head to the user guide or pick a reading track for your role.